You're welcome to scroll down to the physics-engine section if you like. There you will find a video and installation instructions for the Raspberry Pi (RPi). (This tale is related to the scripts and videos presented on the main tutorial page.)
Click to manage cookies. If you accept them, click a video to load; click again to play.

First, some music
(Written in 2015, updated 2025; much has changed.)
From need to revitalize my stereo system came incentive to buy a first Raspberry Pi (RPi). My college-age sons had introduced me to Spotify. This amazing music resource needed to somehow get connected to a Bryston amplifier and Magneplanars that had been too quiet in recent years.
A web search yielded several solutions to this "connection" challenge where new meets old. Volumio seemed like a nice approach: headless, and with control from my laptop or Android device. The overall cost of the project was about $100:
- Raspberry Pi 3 and power supply
- HiFiBerry DAC board
(digital to analog)
- Edimax WiFi adapter
- SD Card
-
Dog Bone
case
(picture of it; no longer an option)
- Corner-post extensions (a couple bucks extra)
- Volumio
- Premium Spotify account (about $10 per month).
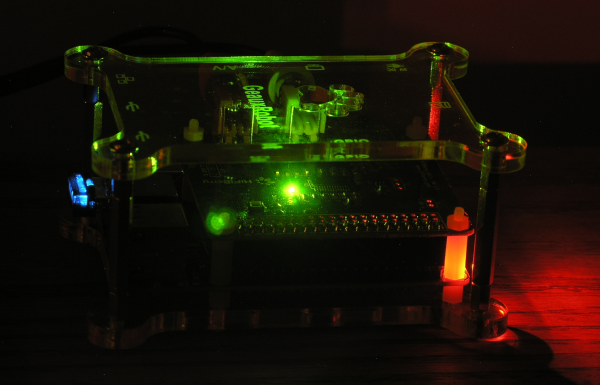
The photo shows the DAC board stacked (on the glowing pastic post) on top of the RPi (in the shadow underneath). Both are housed in the Dog Bone case. If you look carefully, you can see the little extensions to the case's corner metal posts that I ordered to accommodate the added height of the DAC board.
It works well and with a significant step up from Bluetooth audio quality (of 2015). I like to make playlists using the Spotify client on my laptop and then access the playlists from the Volumio client. But you can also search for music directly on the Volumio client. An endless supply of new tunes...
Volumio has integrated the functionality of the old Spotify Connect plugin into the main Spotify plugin. So, it's much easier to setup now, only need one plugin, just install the main Spotify plugin that is available in Volumio. Playlists are accessible via a Spotify client running on a laptop, tablet, phone, etc. You do this by using the "Connect to a device" feature in the Spotify client. This renders (casts) your choices (e.g. pick a song, start a playlist,...), in the Spotify client, onto to your Raspberry Pi which is the hardware host for Volumio.

Fast enough for a physics engine?
It seemed like only seconds after I put down my cash on the RPi-1-B+ that the new and improved RPi-2 was announced. Wow, a promising six-fold improvement in performance and a new incentive to buy. Instead of encouraging me to listen to new tunes, this RPi-2 would be making objects move on its screen and hopefully at frame rates that provide a smooth and stable rendering.
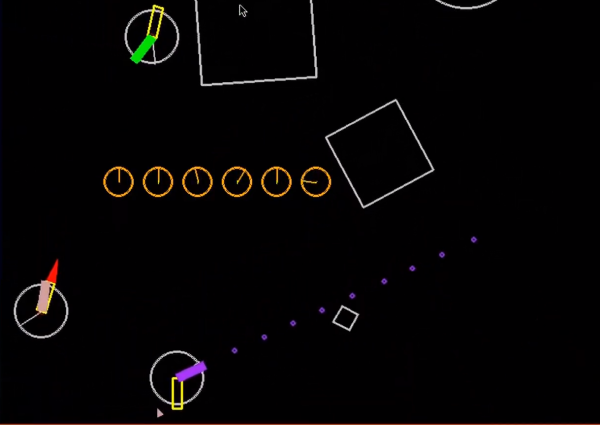
The video here shows that, yes, RPi-2 and its 900MHz ARMv7 CPU and VideoCore IV GPU are enough for the job. This was taken using a camera aimed at the RPi's display (note that software-based screen-capture methods burden the RPi-2 and reduce framerates). The script file running here is A16c_2D_B2D_serverN.py (see corresponding topic on Using Pybox2d in Our Framework from the main page).
Most recently, upgraded to a RPi-5 featuring a 64-bit quad-core Arm Cortex-A76 processor running at 2.4GHz, along with an 800MHz VideoCore VII GPU.
First, I'll ask you to run a script on your RPi-5 and interact with the objects in the Pygame window. Most of these scripts will work with only Python and Pygame installed. (Note: to run the A06, A07, or A16 scripts, you'll need to follow the installation instructions for the Conda environment in the following section.)
From a web browser on your RPi, download a copy of the github repository for these python files. Look for the green "code" button, click it and use the "Download ZIP" option.
Code repository: https://github.com/m-jim-d/pet-code
From the RPi file manage, naviagate to the downloaded file and right click it and use the "Extract Here" option.
Then from a terminal window on the RPi-5:
		cd ~/Downloads/pet-code-main
		python A15a_2D_finished_game.py
Note that a wildcard character (*) is helpful for typing these long filenames. For example, the second line can be typed using the much shorter command:
python A15a*Now it's time to use your keyboard and mouse to interact with objects in the Pygame window.
The commands used in the video are summarized here:
- Select and Move: Click and drag (grab) an object using the mouse. Each of the three mouse buttons has a differing mouse-tether spring strength. Try it. Normally this will auto-select the object's center, but if the "Shift" key is down, any point on the object can be selected.
- Toggle gravity: The "g" key acts to toggle gravity ON and OFF. This particular script changes the background color to blue if gravity is ON. When gravity is OFF, most collisions are modeled as elastic.
- Stop all translation: The "f" key momentarily freezes the translation of all objects. They will start to move again under the effects of gravity or cursor-tether forces.
- Apply torque: The "t" key will torque a selected object. Shift-"t" will torque it the other way. Try spinning one of the squares.
- Stop all rotation: The "r" key momentarily stops all rotational motion for all objects.
- Pause the Physics Engine: The "p" key will toggle the physics engine ON and OFF. This stops everything, physics and rendering. Just hit the "p" key again to wake it up. This is useful if you're playing the Jello Madness game. You tangle the jello, hit the "p" key, then give the keyboard and mouse to your opponent. Your opponent hits the "p" key when ready to start de-tangling (that also resets the jello timer). When the jello is de-tangled, the timer will stop. That's the score (sorry, you have to write it down). Now exchange rolls (your turn). Low score (time) wins.
- Drive and shoot: If you see a circular object with two rectangles anchored to its center, that's a puck, and it has a jet and a gun. The "a," "d," and "w" keys point and fire the jet; the "j," "l," and "i" keys point and fire the gun. The "s" and "k" keys are used to flip the tube directions into an orientation opposing the current motion of the puck; this can be useful in breaking (stopping). Holding down the spacebar turns on a shield that protects you from the bullets of an opponent (or the test puck).
- Zoom in an out: The "h" and "n" keys zoom the view in and out at the cursor position. If the left "Ctrl" key is down, mouse movement acts to pan the view.
- Pick a different demo: Try pressing each of the number keys above the letters on your keyboard (not the number pad). The "7" key starts up the Jello-Madness demo. The "8" key starts the Puck-Popper demo. If your puck gets popped and you want to play again, just press the "8" key again.
- Connect a client to the server: From another computer
(either Windows or Linux) that
has Python installed, type the following in a command line:
The parameter at the end of the command is an example IP address. You'll need to provide the actual address of the computer hosting the A15a_2D_finished_game.py script (or any of the server scripts). It will print its IP address in the command window immediately after starting. In the video, you'll see a second cursor acting to manipulate objects. That's a client computer which has connected to the RPi server. In the video, I'm working both mice, left and right hands...python A10_2D_baseline_client.py 192.168.1.197
The network-client user must have line-of-sight to the server's screen. A projector would be best for games involving more than a few players.
If you're playing Puck-Popper and all the client's pucks have popped, you can always start a new game by pressing the "7" key. Each connected client will get a new puck.
Connection difficulty, client to server, might be a Windows firewall issue. If all else fails, try temporarily disabling the firewall.
The RPi-5 has plenty of muscle to host a Python physics engine. Its modest cost opens all this to teaching/learning environments that are not as well funded as a college J-term course: a high school, a community center, or even a church looking for a way to share its message and give the gift of learning to its parishioners and neighbors in its area.
Installation
This guide walks through installing Miniconda and the physics/graphics packages on a Raspberry Pi 5:
- Python 3.11
- Pygame
- pgu (needed for A06 and A07 scripts)
- pybox2d (needed for A16 scripts)
Python and Pygame may already be on your RPi. Installing this Conda environment is optional, only needed if you are running the A06, A07, or A16 scripts.
Installing Miniconda
- Download the ARM64 Miniconda installer:
wget https://repo.anaconda.com/miniconda/Miniconda3-latest-Linux-aarch64.sh - Make the installer executable:
chmod +x Miniconda3-latest-Linux-aarch64.sh - Run the installer:
./Miniconda3-latest-Linux-aarch64.sh - During installation:
- Review the license agreement (use spacebar to scroll)
- Type "yes" to accept the license when prompted
- Accept the default installation location when prompted
- Type "yes" when asked to initialize Miniconda
- Select "yes" to auto-start the base conda environment in new terminals
- Close and reopen your terminal window
Installing Physics and Graphics Packages
Create a new conda environment with Python 3.11 (recommended for best compatibility). Run these commands, one by one:
		conda create -n physics -c conda-forge python=3.11 pygame box2d-py
		conda activate physics
		pip install pygame-pgu
		pip install python-xlib
This installs:
- Python 3.11
- Pygame for graphics
- Box2D for physics simulation
- PGU for GUI elements
- python-xlib package for updating window captions
Verifying the Installation
After installation, you can verify the packages are installed correctly:
conda list
Now, try running the A06 or A07 scripts from the box2d-pgu environment. These have a gui interface and depend on pgu.
python A07*
Next, try running one of the A16 scripts. These use Box2D and depend on box2d-py. For example, A16c is the Box2D version of the final game script.
python A16c_2D_B2D_serverN.py
Notes
- Installation of Box2D uses box2d-py from the conda-forge channel (ARM compatibility)
- box2d-py works with Python 3.12, but pgu has compatibility issues.
- The box2d-py distribution of Box2D does not support the framework or the example files in the pybox2d_framework_P3 directory of the repository. To try the example files (and A16a_BodyTypes.py), use Windows. Follow the installation for pybox2d on the main PET page.
- The pygame display.set_caption method did not work under the Linux on my RaspberryPi. So using x_window method, set_wm_name, if using Linux (requires python-xlib package). See the update_caption method of my GameWindow class.